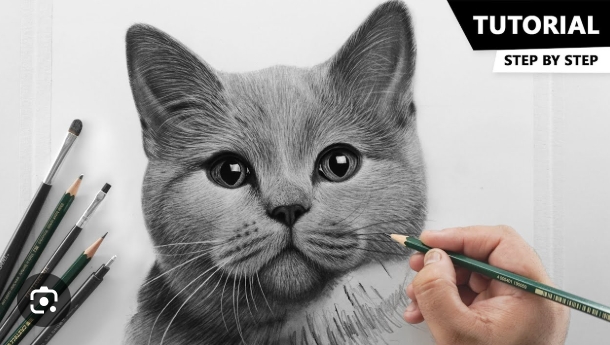
Drawing a cat may seem simple at first, but capturing its elegance, charm, and personality requires careful observation, the right tools, and practice. Whether you are a beginner or an experienced artist, understanding the fundamentals of feline anatomy, texture, and expressions will help you create realistic or stylized cat drawings. In this guide, we will explore how to draw a cat, what tools you need, and the skills required to improve your cat illustrations.

Tools Needed to Draw a Cat
Before starting, having the right tools can make a significant difference in the outcome of your drawing. Here are some essential materials:
1. Pencils
- Graphite Pencils: Ranging from H (hard) to B (soft), these help in sketching outlines and shading.
- Mechanical Pencils: Great for precise details such as whiskers and fur texture.
2. Erasers
- Kneaded Eraser: Useful for lightening areas and creating soft textures.
- Vinyl Eraser: Ideal for erasing strong pencil marks.
3. Paper
- Sketching Paper: Lightweight and great for practice.
- Bristol Board: Ideal for detailed and refined drawings.
4. Fine Liners and Ink Pens
- Used for outlining and defining details in ink drawings.
5. Colored Pencils or Markers
- If you want to add color, choose high-quality colored pencils or markers.
6. Blending Tools
- Blending Stumps: Help in smooth shading.
- Tissue or Cotton Swabs: Useful for softening pencil strokes.
Now that we have the tools, let’s move on to the essential skills and techniques.
Skills Needed to Draw a Good Cat
To draw a lifelike or stylized cat, mastering these key skills is crucial:
1. Understanding Cat Anatomy
- Observe different cat breeds to understand their unique shapes.
- Study skeletal and muscular structures to improve proportions.
- Notice how a cat moves to capture its natural posture.
2. Observation Skills
- Pay attention to details like ear shapes, eye proportions, and fur direction.
- Study real-life cats or reference images to enhance realism.
3. Shading and Texture
- Practice different shading techniques to create depth.
- Use short pencil strokes to mimic fur texture.
4. Perspective and Proportions
- Start with simple shapes to outline the head and body.
- Maintain proper ratios, ensuring the head, legs, and tail are proportionate.
5. Expression and Personality
- Cats have various facial expressions that convey different moods.
- Experiment with different eye shapes and ear positions to create emotions.
Step-by-Step Guide to Drawing a Cat
Step 1: Start with Basic Shapes
- Sketch a circle for the head.
- Add an oval or rectangle for the body.
- Draw small circles for the joints (shoulders and hips).
- Outline where the tail and legs will go.
Step 2: Define the Cat’s Head
- Divide the head circle with light guidelines to position the eyes, nose, and mouth.
- Sketch almond-shaped eyes (cats have slightly slanted eyes).
- Add small triangles for ears, adjusting their tilt for different expressions.
Step 3: Draw the Cat’s Body
- Connect the body to the head using curved lines.
- Sketch the front legs extending from the shoulders and the hind legs folding naturally.
- Add the tail with a curved or fluffy shape.
Step 4: Outline the Features
- Define the eyes, adding pupils and reflections.
- Draw the nose and mouth with simple curved lines.
- Add whiskers extending outward from the cheeks.
Step 5: Add Fur Details
- Use short strokes to indicate fur direction.
- Longer strokes help create a fluffy appearance.
Step 6: Shading and Depth
- Shade areas under the eyes, chin, and body for realism.
- Blend carefully to create a smooth transition between light and dark areas.
Step 7: Finalize the Drawing
- Erase unnecessary guidelines.
- Darken outlines and refine details for a finished look.
- Add color if desired, using subtle shading for a more dynamic drawing.
Common Mistakes and How to Avoid Them
1. Misplacing Facial Features
- Use guidelines to ensure symmetry in the eyes, nose, and mouth.
2. Overly Stiff Poses
- Observe real cats to understand natural body flow.
- Use curved lines instead of straight lines to capture movement.
3. Flat-Looking Drawings
- Add shading to create a sense of depth and volume.
- Use highlights to make the eyes look glossy and expressive.
4. Drawing Fur Incorrectly
- Avoid drawing individual strands; instead, use clusters of lines.
- Follow the natural flow of fur direction for a more realistic look.
Conclusion
Drawing a cat takes patience, practice, and a good understanding of anatomy, expression, and texture. With the right tools, techniques, and observational skills, you can create stunning cat illustrations that capture the beauty and personality of these beloved animals. Whether you prefer realistic sketches or cartoon-style drawings, consistent practice will improve your ability to bring your feline artwork to life. So, grab your pencils, find a reference, and start drawing your perfect cat today!
